Installing VoiceGuide v7 for VoIP / HMP
VoiceGuide v7.x can use VoIP (SIP) to handle calls over the network interface.
No physical cards are needed for deploy a VoIP/SIP only system.
VoIP/SIP deployment can be made on:
- Physical server
- VMware ESXi Virtual Machine
- Amazon Web Services (AWS)
- Microsoft Azure
- Microsoft Hyper-V
- Cloud hosted VMware ESXi Virtual Machine
Dialogic HMP licenses are needed in addition to VoiceGuide licenses.
Please contact sales@voiceguide.com regarding purchasing of Dialogic HMP licenses.
HMP can also use Dialogic HMP Interface Boards to allow HMP systems to connect to physical T1/E1/Analog lines.
Deploying on Cloud
Supported Cloud environments:
- Amazon Web Services (AWS)
- Microsoft Azure
- Cloud hosted VMware ESXi Virtual Machine
VMware ESXi Cloud providers can be found here: https://cloud.vmware.com/providers
eg: Google Cloud VMware Engine, Lumen
VMware ESXi
If deployment is made on VMware ESXi virtual machine, VMware's Latency Sensitivity for that machine should be set to "High".
To set Latency Sensitivity to "High":
- Right-click the virtual machine and click Edit Settings.
- Click VM Options and click Advanced.
- Select a setting from the Latency Sensitivity drop-down menu.
- Click OK.
Note: Some ESXi versions require full CPU reservation and Memory reservation to allow Latency Sensitivity to be set to "High".
Installing Dialogic HMP
Dialogic HMP 3.0 drivers should be installed before installing VoiceGuide.
Before installing HMP ensure that all available Windows Updates have been applied. Use the Windows Update app from Windows' Settings or Control Panel to check for any outstanding updates and complete their installation before proceeding with HMP install.
Dialogic HMP requires that the HPET (High Precision Event Timer) is enabled on the system. The following command should be ran at the "Command Prompt (Admin)" to enable the HPET:
bcdedit /set useplatformclock true
Windows must be restarted afterwards to enable to HPET.
HMP must be installed using an Administrator account, or using "Run as Administrator".
After HMP installation Windows must be restarted.
Changing HMP Version
Existing HMP must be fully uninstalled. The "Do not save any configuraton settings" option must be selected when uninstalling.
Windows must be restared to complete the uninstall.
Only then can the new version of HMP be installed.
After HMP installation Windows must be restarted again.
After Installing Dialogic HMP
Confirm Dialogic Configuration Manager (DCM) can start the Dialogic service.
It is best if only one network interface is enabled on the system.
If more than one network interface is enabled on the system then Dialogic HMP must use the 'First' network interface for all VoIP/SIP communications.
Windows Power Management is not supported and must be disabled. Dialogic drivers do not handle resuming from Sleep or Hibernation states. Hybrid Shutdown" or "Fast Boot" is also not supported and must be disabled.
On systems that have an option to set 'C-State' (power mode) in BIOS, the C-State must be disabled (set to C0). i.e. the CPU is 100% turned on.
If Dialogic HMP service has problems starting then you should ensure that there is no other VoIP
software installed on the system that would interfere with HMP operation, and that no anti-virus type software is blocking the service start.
If there are still problems, try fully disabling the Windows' User Access Control and then reinstalling the Dialogic drivers. Windows' User Access Control is disabled in the Windows Registry, by setting the EnableLUA parameter to 0.
To re-install Dialogic drivers you need to first fully uninstall, selecting 'Do not save configuration', and restart system after uninstall. After installing the Dialogic drivers the system needs to be restarted again.
It's recommended to set the Dialogic service to start automatically. This can be set using DCM 's Settings -> System/Device autostart -> Start System menu, or by using the Windows' Control Panel -> System and Security -> Administrative tools -> Services applet.
HMP comes with a 1 port Evaluation license. Please contact sales@voiceguide.com regarding purchasing of HMP licenses.
T1/E1/Analog HMP Systems
For systems which use Dialogic HMP Interface Boards to connect with T1/E1/Analog lines please refer to installation and configuration instructions for the board which is used.
After the boards are detected in the DCM the 'Device -> Restore Defaults' menu command should be ran for each the cards present in system, as well as for the 'HMP_Software' device, and the 'Configured Devices' root.
Installing VoiceGuide
Dialogic's HMP drivers must be installed before proceeding with VoiceGuide installation.
VoiceGuide needs to be installed using the Administrator account.
If not logged in as Administrator then right click on VoiceGuide install .EXE and select 'Run as administrator' :

The VoiceGuide installer will then start:
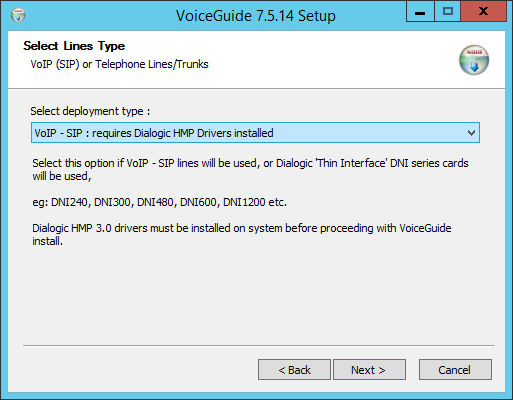
Then default "VoIP / SIP" option will result in the VoiceGuide installer setting up configuration files for the Dialogic HMP based VoIP/SIP systems:
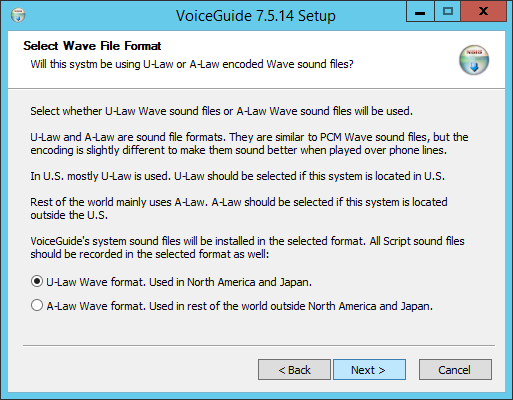
Then select whether by default the system should use ULaw or Alaw format when recording files, and which format 'system sound files' should VoiceGuide use.
VoiceGuide will play back many different format sound files, and this selection will not restrict what sound files can be played, but this selection decides whether ULaw or Alaw format will be used when recording. Matching VoiceGuide's record sound format with the format used by telephone service provider results in best quality sound recordings.
Also, playing sound files in the same format as what the telephone service provider uses means that the files will not need to be transcoded or resampled when sent over the telephone service provider's network. This helps in achieving the best possible quality sound playback.
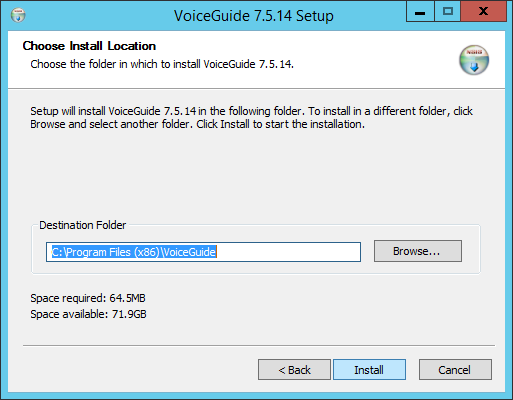
Next select the directory into which VoiceGuide should be installed.
If you select a directory other than the default directory then the VoiceGuide's Config.xml setting that specifies the callflow that is to
be used on each channel will need to be updated with that directory details. (and VoiceGuide service restarted afterwards).
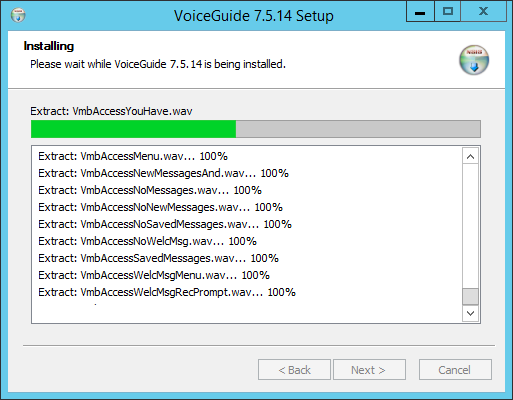
The files will then be installed:
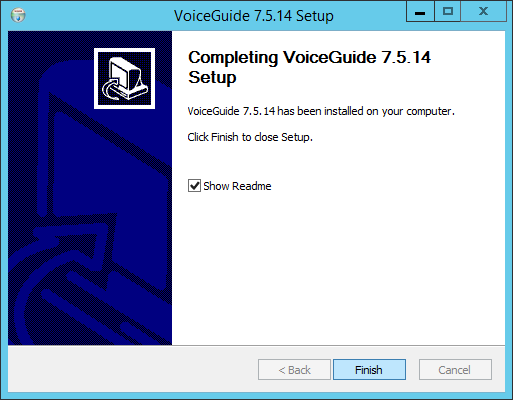
When installation is complete the final screen will appear:
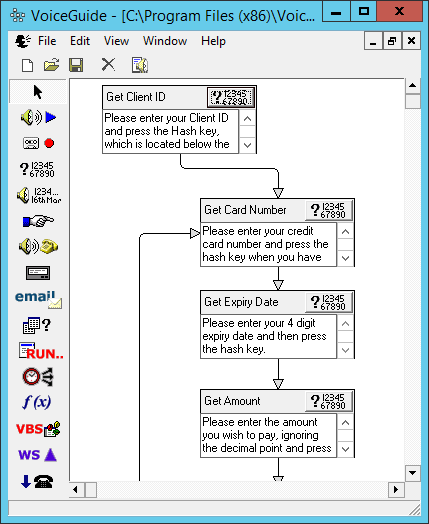
And the Script Designer will be started, loading the default demo callflow.
(The callflows/scripts to use are set in the Config.xml file):
The IVR icon will also appear in the icon tray at the bottom right of the screen.
Once the VoiceGuide Service starts a still green arrow will show on that icon:

If VoiceGuide was installed into the default directory you should now be able to call into the system and have VoiceGuide answer the incoming call and take the caller though the demo script set in Config.xml (the Credit Card Payment script).
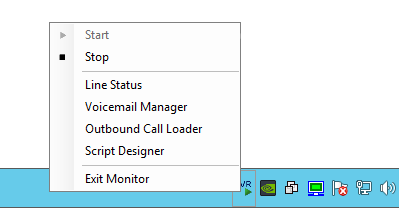
Clicking VoiceGuide's IVR tray icon shows a context menu that allows user to control the VoiceGuide service, and start various VoiceGuide applications:
Testing VoiceGuide
To test the VoiceGuide installation you can place a call into the system by dialing the IP address of the system from SIP VoIP phone, or from a SIP softphone on another system.
The SIP call should be made with the G.711 codec enabled on the dialing phone, as when the Dialogic HMP is ran in evaluation mode it only supports the G.711 codec. Either G.711 ALaw or G.711 uLaw are fine.
Best if for initial testing the dialing phone is on same network segment as the VoiceGuide system, with no other routers etc. in between. This is to ensure that the SIP messaging is not being affected by any devices in the network path between the dialing phone and VoiceGuide.
When a SIP call arrives at the VoiceGuide system, VoiceGuide should answer the call and start the demonstration 'Credit Card Payment' script, which asks caller to enter some details (card number, amount etc.) and the plays the entered information back to the caller.
The demonstration script is located in VoiceGuide's \Scripts\Credit Card Payment\ subdirectory.
After you hear the demonstration script answer the call you are now ready to start creating your own scripts, make outgoing calls etc.
The Script Designer and other VoiceGuide applications can be started by right-clicking on the IVR tray icon and selecting from the context menu.
If not running as a user with Administrator privileges then you will not be able to stop and start the VoiceGuide service using the VoiceGuide Service Monitor applet from the icon tray. You will need to go to Control Panel -> System and Security -> Administrative tools -> Services and stop and start the VoiceGuide service from there.
Softphones
NOTE: The testing softphone MUST NOT be installed on the same system as Dialogic HMP.
It must be installed on some other system.
There can be no other SIP software that uses SIP 5060 port installed on same system as Dialogic HMP.
Only one software can use the SIP 5060 port at a time.
One softphone that can place calls to an IP address is MicroSIP : https://www.microsip.org
MicroSIP allows dialing addresses in format:
number@ip_addres
eg:
1234@192.168.0.87
Some versions of MicroSIP also allow dialing an IP address without the number@ before it.
eg:
192.168.0.87
Another softphone that can place calls to an IP address is Linphone : http://www.linphone.org
With Linphone the SIP address to be dialed must be prefixed with "sip:"
eg:
sip:1234@192.168.0.87
or:
sip:192.168.0.87
Also please select Linphone's Options->Preferences menu, and set the following:
Network Settings tab : Media Encryption is set to 'None'
Codecs tab: only enable the G.711 ULaw and/or the G.711 ALaw codecs (PCMU and PCMA codecs), and disable the rest.
Another older softphone that can also dial the IP address directly is SJPhone.
With SJPhone the number@ip_addres address or just the IP address by itself can be used.
Tracing SIP Messages
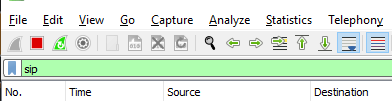
WireShark : https://www.wireshark.org can be used to confirm that SIP packets are arriving at VoiceGuide/HMP system.
To isolate SIP traffic the following should be specified in WireShark's Filter text box:
sip
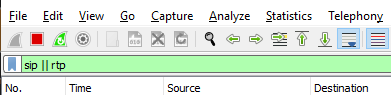
To isolate SIP and RTP traffic the following should be specified in WireShark's Filter text box:
sip || rtp
To save the isolated traces go to WireShark's File->Export Specified Packets menu and save the displayed packets as .pcapng format.
Configuring VoiceGuide
VoiceGuide configuration is set using the following files: VG.INI and Config.xml
VG.INI file is located in VoiceGuide's main directory. Usually: C:\Program Files (x86)\VoiceGuide\
Config.xml file is located in VoiceGuide's \conf\ subdirectory.
Config.xml is used to set what lines/channels are opened by VoiceGuide and what script is to be used when answering incoming calls on each of those lines/channels.
Sample Config files are provided showing how to set up the Config.xml file for larger systems.
If not running as Administrator then some permission changes may need to be made to allow editing of Config.xml, VG.INI, etc. files.
In Windows Explorer:
- Right click on the VoiceGuide directory
- Select Properties
- Go to the Security tab
- Make the necessary changes
Alternatively, the text editor application used to edit the Config.xml, VG.INI, etc. files would need to be started using the 'Run as administrator' option.
Then Windows will not block the saving of new versions of Config.xml, VG.INI, etc. files.
We recommend using this text editor: Notepad++ : https://notepad-plus-plus.org/
PBXs and SIP Trunks
VoiceGuide can 'register' itself with PBXs and SIP Trunk providers. Configuration of the registration parameters is made in Config.xml, in the VoIP_Registrations and VoIP_Authentications sections.
Please see the VoIP/SIP LINE REGISTER section of the manual for information on how to configure VoiceGuide's SIP registration.
Setting Transport Protocol and Port
Default transport protocol is UDP. Most VoIP systems use UDP for SIP communications. If the VoIP systems with which VoiceGuide is to communicate use TCP instead, then VoiceGuide can be configured to use TCP by setting the following entry in VG.INI's [SIP] section:
E_SIP_DefaultTransport=ENUM_TCP
Port used can be set using the sip_signaling_port entry.
Firewall Configuration
Firewall needs to be set to allow incoming SIP and RTP packets from the SIP provider's IP addresses to these local ports:
5060, 5061 (UDP/TCP) - SIP
49152 - 50000 (UDP) - RTP traffic
6000 - 6100 (UDP) - if T.38 fax is used
Dialogic HMP can be set to use different ports to above if required.
WireShark and Firewall logs are useful in debugging VoIP connectivity issues.
If you are encountering problems with receiving IP communications from remote end
you can try to temporarily disable the firewall to see if the issue is the firewall or some other routing issue.
Wav file format
Most VoIP service providers use uLaw in their G.711 connections.
Sound file format should match the encoding format used over the connection.
If uLaw encoding is used then the sound files should be .WAV format with uLaw encoding (8kHz, 8 bit, Mono, uLaw).
If ALaw encoding is used then the sound files should be .WAV format with ALaw encoding (8kHz, 8 bit, Mono, ALaw).
This will result in exact same bytes from the .WAV sound file to be sent in the outgoing RTP packets,
and the exact bytes received in the RTP stream will be saved into any recorded sound files.
This allows for exact control over the sound data sent over the VoIP connection, and saving of sound data exactly as it has been recieved.
Dialogic HMP Installer Walkthrough
1. Starting the Dialogic HMP will show the following window:

2. Click Next to continue.
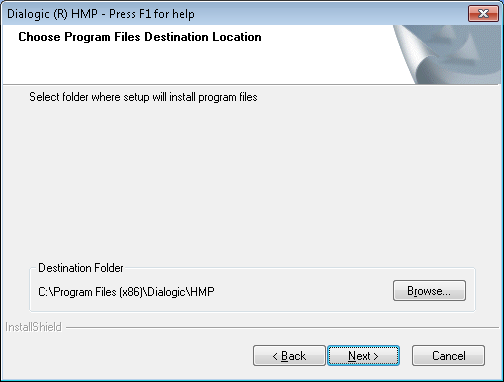
3. Click Next to accept the default install folder for program files.
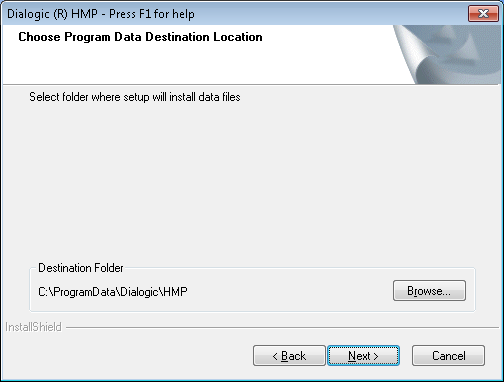
4. Click Next to accept the default install folder for data files.
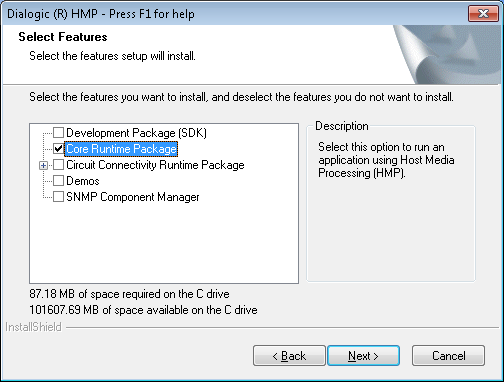
5. Check the Core Runtime Package option and then Click Next to continue.
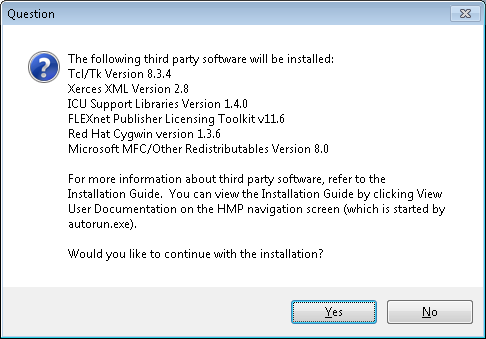
6. Click Yes to accept installation of required 3rd-party software.
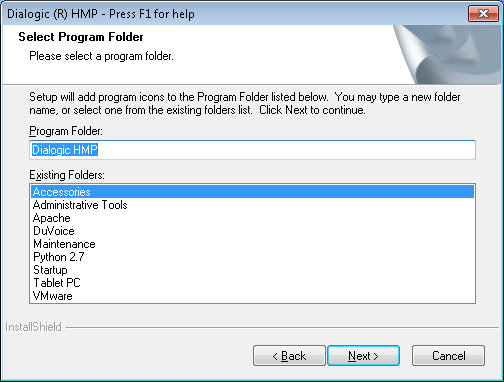
7. Click Next to accept the default program folder.
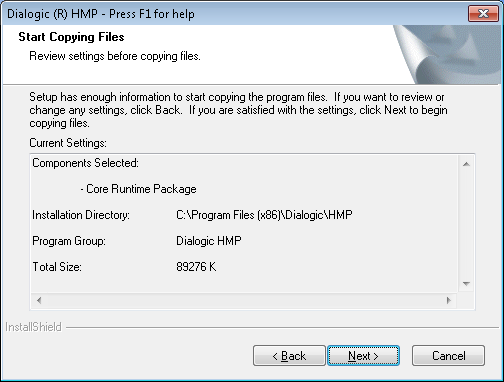
8. Click Next to accept the selected options and continue.
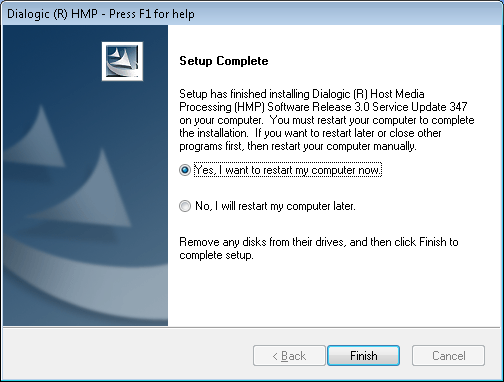
9. The computer must be rebooted after the installer is finished.
Select Yes, I want to restart my computer now and then click Finish.
The computer will now be restarted.
Installing Dialogic HMP License
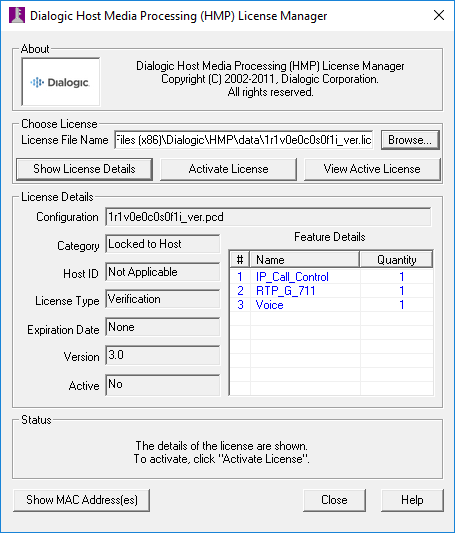
1. Starting the Dialogic HMP License Manager will show the following window:
2. Click Browse, as indicated below:
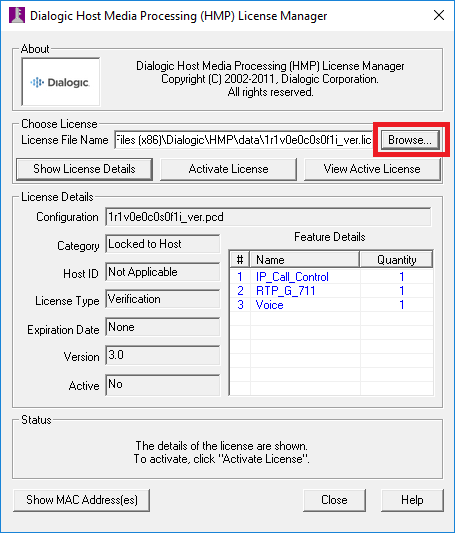
3. Windows File Explorer window will open. Browse to and select your license file.
After the file was selected its path will be displayed in the "License File Name" text box:
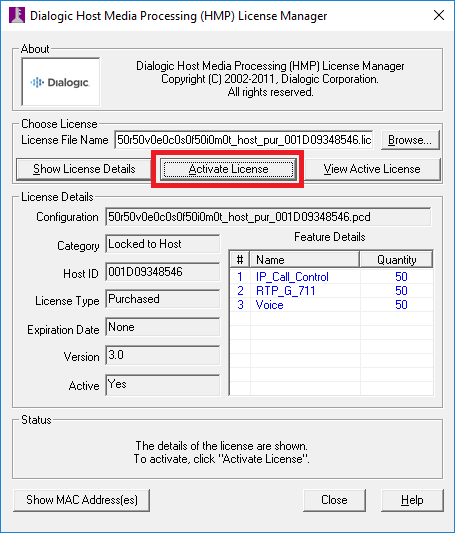
4. Click Activate License. Window below will show advising what additional steps still need to be taken before the new license can be used.
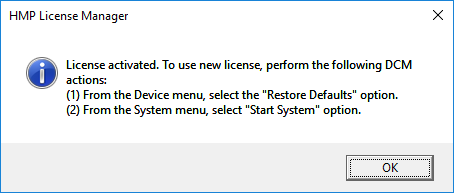
5. Click OK and exit the License Manager.
The license will now need to be 'Assigned' as per the instructions in the last window.
Please continue with the "Assigning the Dialogic HMP License" instructions below:
Assigning the Dialogic HMP License
After selecting the new license in the HMP License Manager, the following steps need to be performed in the DCM:
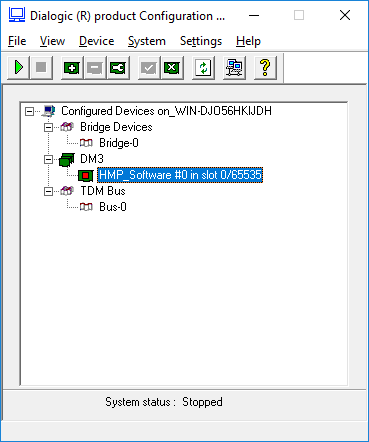
1. From the Start menu, run the Dialogic Configuration Manager - DCM.
Ensure the Dialogic HMP service is stopped.
Click on the "HMP_Software" entry in the DCM to select it:
2. Click Device -> Restore Defaults menu.
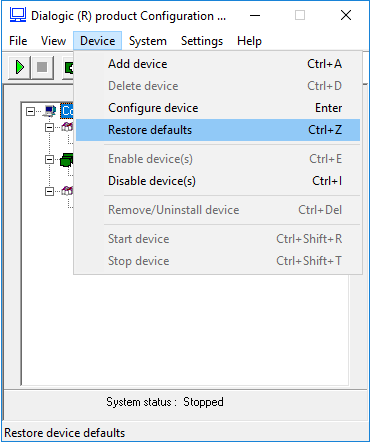
3. The screen below will show:
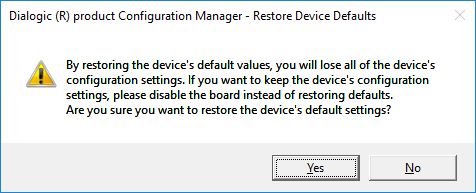
4. Click Yes. The "Assign Firmware File" windows will open:
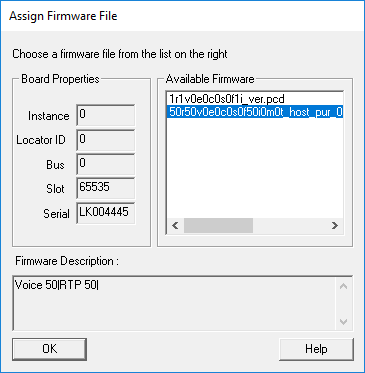
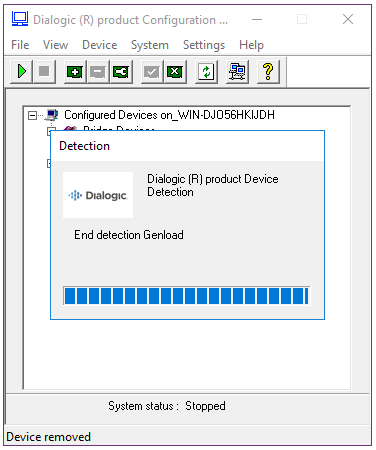
5. Select the license which you want to use and then click OK.
Another Window will open for a few seconds:
6. On completion the "Restore device defaults successful" message will be shown at the bottom of the DCM Window:
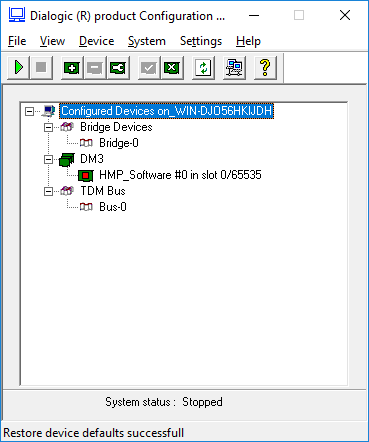
7. License has now been assigned and HMP is fully licensed.
You can now start the HMP service and the VoiceGuide service.